We’re getting closer to actually sending some emails out now…
At this stage you need to go back to your workflow, tell it which email template to use, and also give that email some content. When we entered ‘%message%’ in the HTML file, we were telling Talent to use the message data from the workflow editor. So now we need to create that message data. Go back to your workflow list via your preferred method (like Leave and absence > Links > Setup > Human resources workflows) and open the leave request / manager approval workflow by clicking on the workflow ID.
At this point the workflow editor will start to open. If it’s the first time you’ve done this, you might find it looks a little bit retro. Stick with it, it works. You’ll have to enter your login credentials and when it connects you’ll see a visual representation of the workflow itself, kind of like a flowchart.
First of all we need to tell the workflow which email template is going to be generated when this workflow needs to send a notification. To do this, first of all make sure that the box outlining the whole workflow is highlighted orange, to indicate that it’s selected.
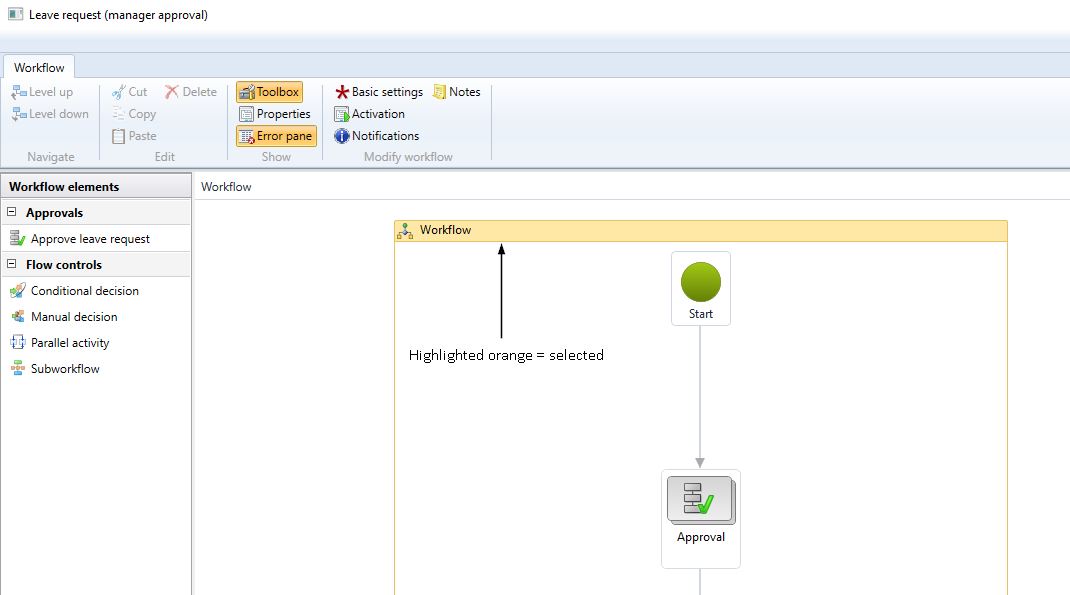
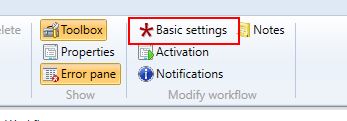
Then click the ‘basic settings’ button
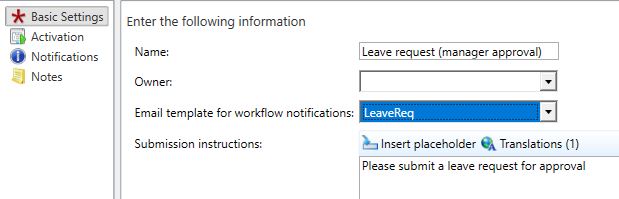
And in the dialog box which appears, in the ‘Email template for workflow notifications’ field, select the email template you’ve just created in the Sys Admin workspace.
So now we’ve mapped the two templates, we have to create our actual messages. This is a bit like doing a mail merge. You put a load of text in, and add variables/bookmarks that tell Talent where to merge in data which is specific to the request. We’ll create 3 types of notifications – one to tell the manager a request has been submitted, one to be sent to the requester if the request is approved, and one to be sent to the requester if the request is denied.
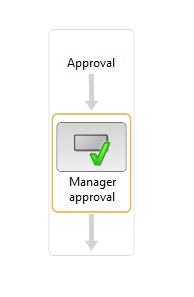
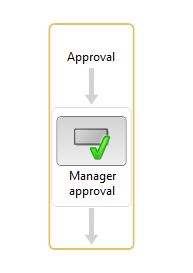
These messages relate to different parts of the workflow, so we need to dig a bit deeper in the workflow editor. By double clicking on elements in the flowchart, you get different menu options which relate specifically to that stage in the workflow. You’re moving up and down in terms of levels of detail (which is why you get a ‘level up’/ ‘level down’ box in the top left hand corner). To edit the message which goes to the manager, we want to get right down to the manager approval activity. It’s two levels down, so keep double clicking on that box with a green tick in it until it looks like this:
If you now click on that same ‘basic settings button’, you’ll get different options. The ‘work item instructions’ section is where you can enter the text that will pull into the email using that %message% tag. Clicking ‘insert placeholder’ will allow you to add in one of those bookmarks/merge fields, which will be populated with specific details of the request when the email is generated. When you’ve written the message you want to send to the manager, close the form.
Now we’re going to edit the approval/rejection messages. These relate to the approval as a whole, so we need to now select that entire activity by clicking somewhere in the white box until the activity looks like this:
Clicking on the ‘Notifications’ button in the ribbon will open the properties form again, this time with the notifications tab selected. We’re going to select 2 different notifications to be sent – one on approval, one on denial. When you check the box and select the row, the rest of the form opens up. You can populate the message here using the merge field again.
For these two messages, we also need to indicate who the recipient should be. We want this notifications to go to the person who originally submitted the request, so we’ll select ‘workflow user’ on the recipient tab. This opens up another tab where we have to select which workflow user should receive the notification – for our purposes, it’s the workflow originator.
Once we’ve edited the notification messages, close the window, and save and close the workflow. When you get the message asking if you want to activate the new version, say yes.
1 thought on “How to set up email notifications for leave requests – 4 – Mapping your template to your workflow”