When Talent launched in 2017, two of the most exciting bits of the product were the new ‘experience’ apps – Attract and Onboard, which dealt with the processes needed to get a new recruit successfully into your business. Both apps are accessible in a few ways – one being via the default dashboard.
As standard, in order to democratise these products and empower as many workers as possible, access to the menu item in Core which launches these products is part of the ‘Employee’ role. I’ve worked with several customers in Talent though who, for various legitimate reasons, aren’t yet ready to have the entire workforce dive in to those apps. When we launch self service therefore we need to remove those menu items from the default dashboard.
Just like in many Microsoft products, there are probably several different ways to achieve the same end result. This is just the easiest one I’ve found (and the easiest to reverse, if you change your mind later).
If you don’t know anything about how security roles work in Talent, you might want to read up on it a bit first. This article (opens in a new tab) about how security in Dynamics 365 for Finance and Operations works is a good place to start, and Talent follows the same model.
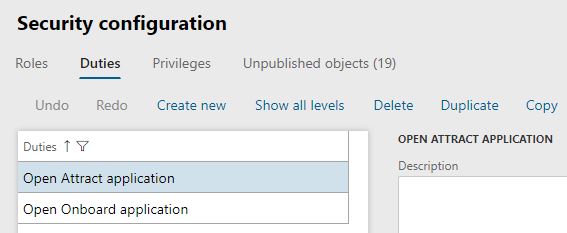
The presence of those menu items on the default dashboard (and the left hand menu) is controlled by two duties – ‘Open Attract application’ and ‘Open Onboard application’.
To control which users see those menu items, you simply assign those duties to the appropriate role.
If you don’t want anyone to see them, you just have to remove them from the ‘Employee’ role. But you might want HR to have access, in which case you would assign those two duties to your HR roles only. It’s a matter of choice. Here’s how you’d do it:
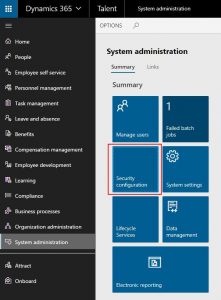
Open System Administration module and click on the ‘Security configuration’ tile
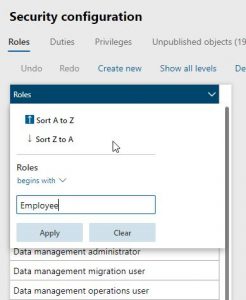
Filter the roles list to select the ‘Employee’ role
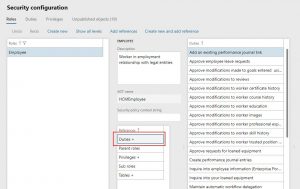
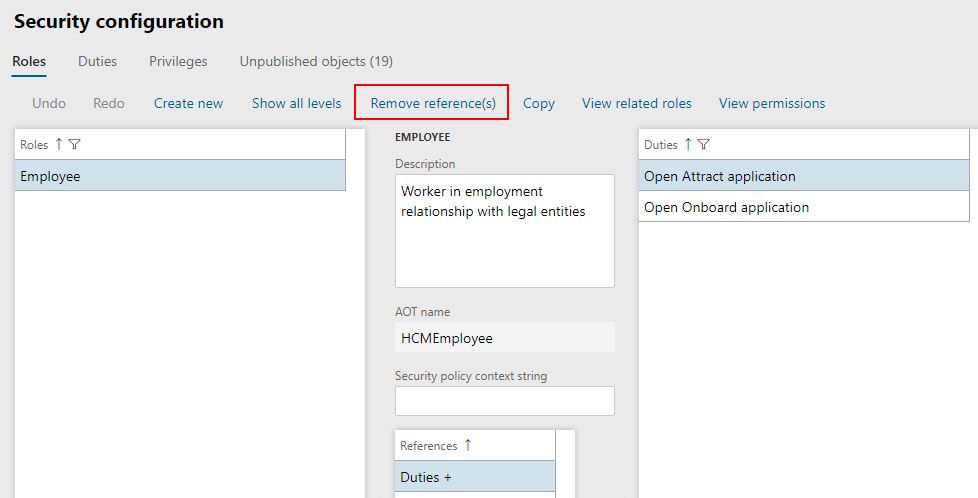
Select ‘duties’ in the references column to bring up a list of the duties present in the Employee role
Filter the duties list to show the duties you want to remove from the role, select the duty you want to remove, and hit ‘Remove references’.
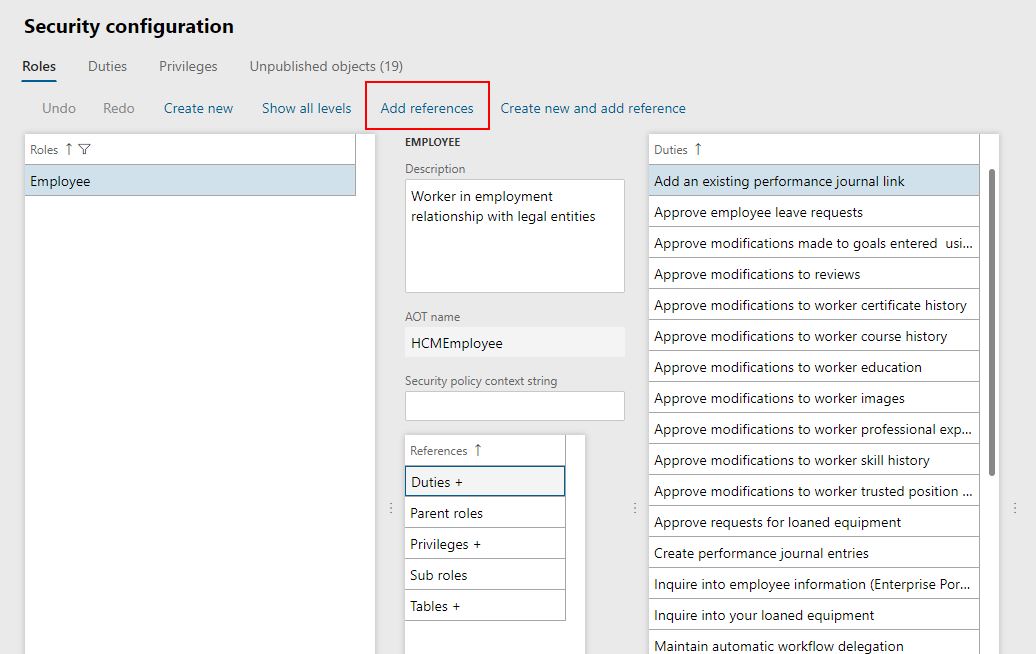
To add the duties to another role, simply locate the role, select duties under the references column, and hit ‘Add references’
When you’ve finished making changes to roles, you need to publish them to make the changes applicable to users. Hit the ‘unpublished objects’ button and review the list shown. Select the roles you’re ready to publish, and hit publish.
The menu items for Attract and Onboard should now only appear for users who hold the roles where the relevant duties are found.
A little warning learned from painful experience – if you take this knowledge and start making other changes to roles, be careful. Getting something wrong can be tricky to unpick later. As a personal preference, I very rarely make any actual changes to the ‘sample’ roles – the basic set that come pre-loaded when you deploy the product. I prefer instead to use those as an untouched template, and create copies of specific roles, duties, and privileges for the customer if the samples don’t quite work for them. Then if all else fails, you can always revert to the sample role and start again. I also make obsessive notes while I’m making security changes, so I know exactly what I’ve done and can replicate it later if I need to.
1 thought on “Controlling access to Attract and Onboard from the default Core HR dashboard”