If you’ve read my ‘About’ page, you’ll know that I was raised in a SAP world when it comes to HRIS. And if you’ve ever touched SAP, you’ll know that it is OBSESSED with dates.
That’s not necessarily a bad thing, and one of the features I found hardest to get my head around in HR in Talent/Finance and Operations/AX is that while in many places it is equally date driven, it’s quite a lot less in-your-face about it than SAP.
One of the questions that comes up regularly in initial or refresher training for HR users in any of these Microsoft systems is how to make worker addresses date effective. A lot of HR departments need to show an accurate address history for their workforce. This is usually followed by a customer discussion about why you’re interested in anything but the most recent address, to which the answer usually is:
We need to know what was the known current address on any given date, so that if we’re challenged on why a payslip wasn’t sent/casework documents weren’t received etc, we can evidence which address would have been used.
There is (of course) the facility to do this in Talent (and AX, and FinOps…) but it’s a bit tucked away and can take a bit of poking to get your head round. It’s easy enough to see that the fields are there to do it, but you have to do things in the right order or you’ll probably get stuck.
There are two key things you need to know before you start doing anything:
- Once you enter address data manually for a worker, they must have a primary address. If you only enter one address, that becomes the primary by default. Primary addresses that are not marked as private are a security risk – so be careful if home addresses are the first addresses you load for the workers.
- You can’t edit the validity period of a primary address – the date fields are greyed out.
Ok – so here’s how you add a new address and expire the old one for a worker. Let’s assume you’ve already entered the primary address as the home address, set it as private, and you’ve now been notified that the worker has moved house:
Go into the worker record and scroll down to the addresses grid. Leave the grid as-is, click on more options, and select ‘Advanced’
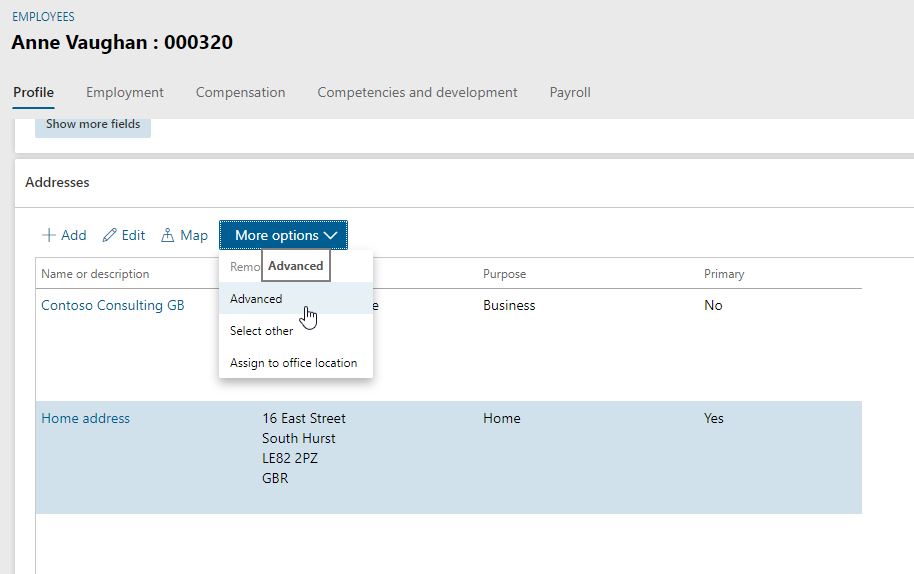
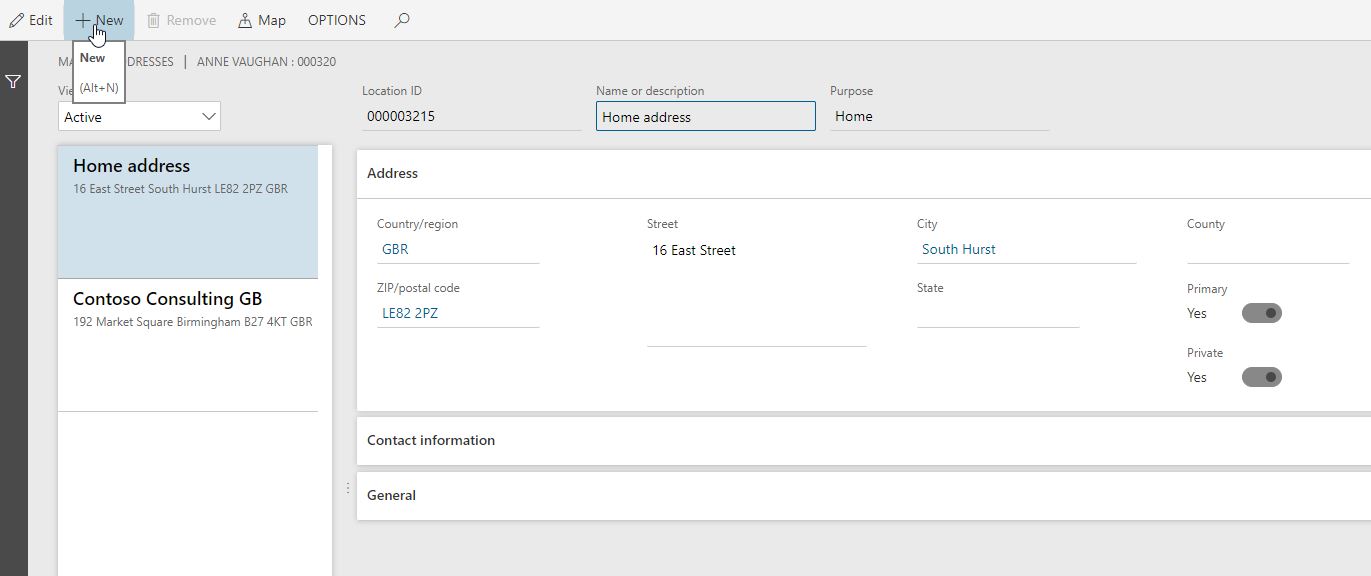
This’ll open the ‘manage addresses screen, where you can see all the addresses (past, present and future – filtered by default to present in that ‘Active’ drop down). Ignore them all for now, hit ‘New’ and enter the new home address that the worker has just moved to.
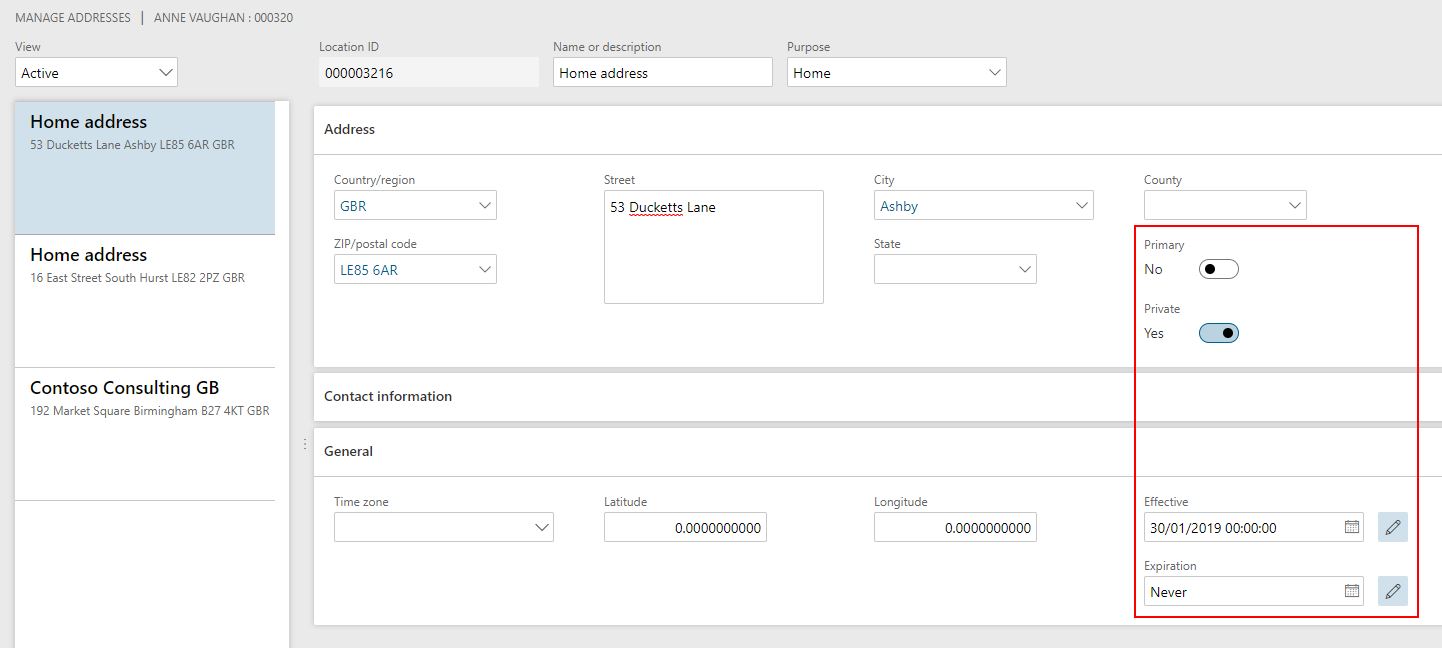
Entering the new address details shouldn’t be rocket science if you’ve already created their previous home address, but this time there’s a difference. Assuming that their old home address was the existing primary address, you need to switch on the primary toggle here when you create the new address. Doing so will prompt a pop up which asks if you want to ‘unmark the existing primary address’ – to which you answer yes. This is the only way to make a new address primary – you can’t go directly into a primary address and make it not primary any more – you have to nominate the new primary, which in turn de-selects the old one. Remember that if this is personal data, you must also set that private flag to yes. If you then pop open the ‘General’ tab, you’ll see you can set an effective date for this new address. That might be the date they moved in, but more likely, you’ll want to set that as the date they notified you of the change.
Once you’ve added the new address and made it primary, there’s one more thing you need to do, and that’s to go in and retire the old address so it no longer shows as active in the addresses form. Remember that all active addresses are visible to the worker in self service, and it doesn’t exactly build confidence in HR if they’ve told you about an address change, but they can still see the old one. In actual fact, they have the same ‘active’ filtering options in ESS as in the maintain address form here, but it’s the active ones that are shown in the standard grid.
To retire the old address, simply go into the old address on the maintain addresses form. Now that it’s not the primary record, you’ll see that you can edit the expiry date on it. Set it to expire whenever you like – but again, this is most likely to be the date you were notified of the new address.
Now you’ll find you can use that ‘View’ drop down to toggle between active and expired address records, and you can check out the dates they were valid for…
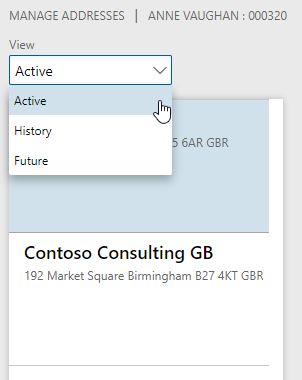
…And when you go back to the address grid on the worker form, you’ll only see the active address records that are valid right now.

So that’s it. It’s pretty simple once you get the sequence of clicks down, and this kind of clarity in your data lends you far more credibility with your users when/if you push out self service. In fact, if you are pushing out self service, you might want to share this sequence with your workforce too, as the exact same approach will work there.