So you’re using Dynamics 365 for Finance and Operations to run the projects and finance bit of your business, and Dynamics 365 for Talent is underpinning your HR function. Your employees are going to the employee self service (ESS) workspace in Talent to book leave, update their details, and take part in performance reviews, but their project timesheets and expenses are still being managed in FinOps. Fiddly, right?
Well not really. Because you can deep link from ESS in Talent direct to the right page in FinOps. Your users just click the link, the right page in the right environment opens up in a new browser tab, and they crack on as if nothing happened. Here’s how you set it up.
First of all, open your FinOps environment and work out exactly where you want to send your users. For this to work, you have to be directing them to a specific menu item. The menu item is shown in the URL after ‘&mi=’. For the ‘My timesheets’ page, the URL looks like this:
https://myenvironment.cloudax.dynamics.com/?cmp=DAT&mi=TSTimesheetEntryGridViewMyTimesheets
Therefore the menu item we need is ‘TSTimesheetEntryGridViewMyTimesheets’.
With that info to hand, jump in to the Talent environment that you want to link out from. Go to System Administration > Links > User defined links > Configure links.
If this is the first link you’ve added, you’ll need to configure the target system first. This just adds in the URL of the environment you’re linking to, so you can just select it by name from a drop down when creating the specific link to the menu item. Click the ‘configure target system’ button to get started.

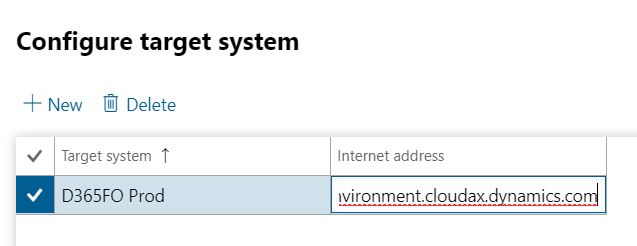
This will open up the form where you enter the details of the target system. The target system field is just looking for a descriptive name for the system. I usually include the environment name as well just to be especially clear (the end users don’t see this) – for example ‘D365FO Prod’. The web address field is looking for the URL of the environment you’re linking to – make sure you don’t include anything after ‘.com’ – we don’t need any company info or a menu item. When you’re done it should look something like this:
Now you need to create the actual link, bearing in mind you might well be linking to multiple places (e.g. timesheets, expenses etc) within the same environment. To create the link, just hit ‘New’ on the Configure Links form.
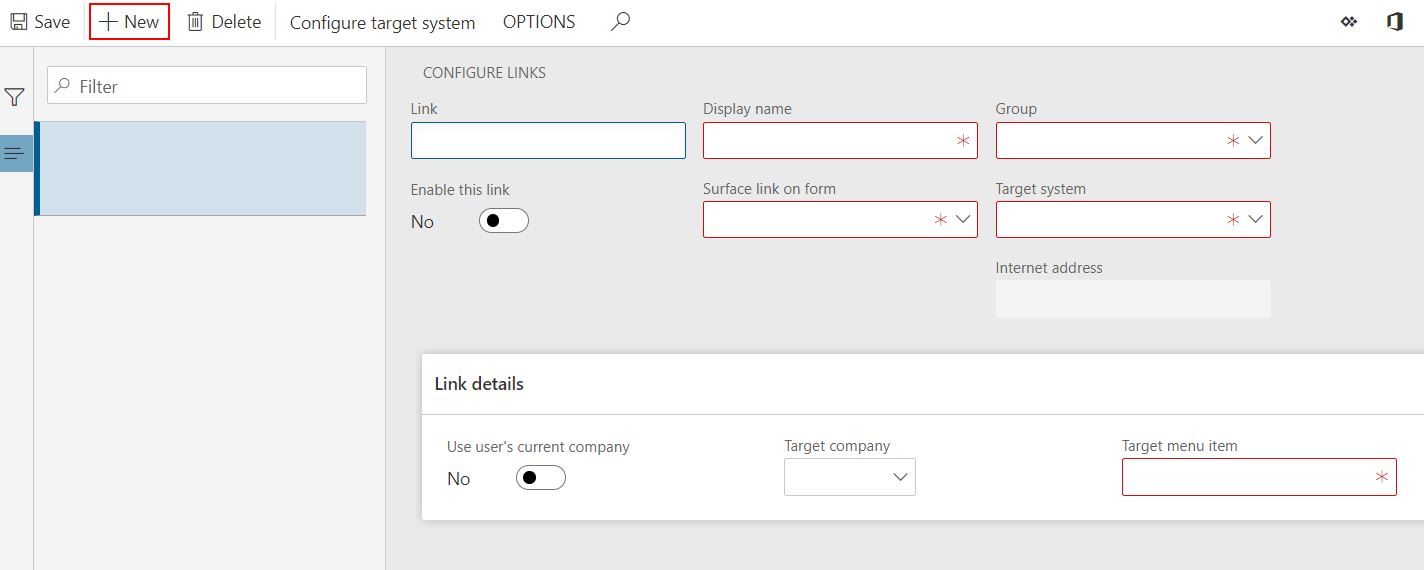
Now you’re entering the options for a single link to a specific location in the target system.
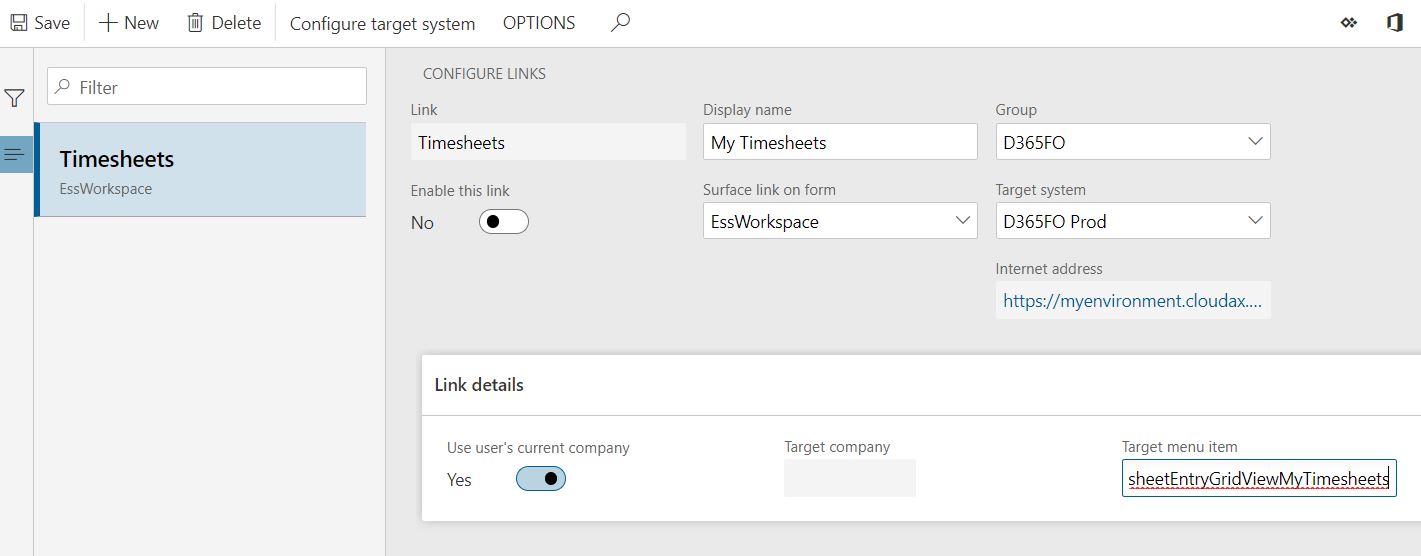
Link – this is internal text for your reference only, and doesn’t appear to the users anywhere. Just make it meaningful to you.
Display name – this is what will appear to the users – make sure it will be meaningful to them
Group – Links are grouped on the toolbar and what you enter here is used as a heading for the group. If there are no options in the drop down it’s because no groups have been created yet. To create a group you can just type directly in the box.
Enable this link – not quite as self-explanatory as it appears, this is a useful little slider which allows you to test the link you’ve created before you push it out to all users. If enable is set to ‘No’ – only you will be able to see it. Once you set it to ‘Yes’ – you’re pushing it out to everyone.
Surface link on form – you can choose to show these links on four forms (at the time of writing). Either ESS – most relevant for this example, the job form, the position form, or the worker form.
Target system – this is where you’re going to pick the system you created in the last stage. When you save the link, the web address entered for the target system will show up in the internet address field just below.
Use user’s current company / Target company – you’re picking one or the other here, you don’t need to do both. You can either push through the info from the user’s current legal entity in Talent, or push them towards a specific one. My preference is usually to take the user’s current company, that just seems to make more sense, but you have the option.
Target menu item – this is where you’re going to paste the menu item you worked out earlier. You don’t need a full URL or anything, just the letters. For the timesheet example you need to stick in ‘TSTimesheetEntryGridViewMyTimesheets’.
When you’re all done, you’ll have something like this:
Before you push the link out, you’ll want to test that it works and you’ve done everything correctly. Leave ‘Enable this link’ set to ‘No’ and jump into the form where you added the link – in this case ESS. You should see a menu item for ‘Links’ and a new group and link added.
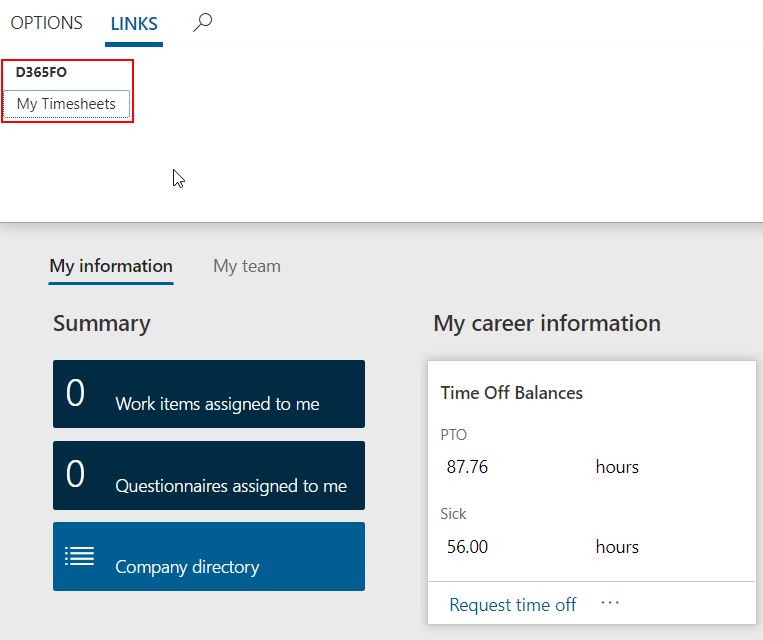
Notice that the group name and link display name have pulled through and are visible to users. Give the link a try – if it works, go back in to the configure links page, and set ‘enable this link’ to yes. That’ll make the link available to all the other users.
Handy, eh?!
Very helpful blog on configure links